There are many animation and motion design software available, but they can be costly and complex to use. To make animation and cool motion design easier, the Aninix plugin can be used in Figma to make the process simpler and more accessible, without requiring a high-spec system.

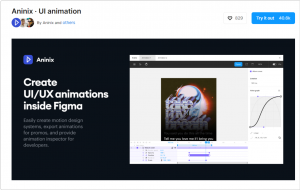
Aninix is a Figma plugin. It is an advanced animation tool that helps Designers create stunning animations for their web and mobile applications. With Aninix, designers can create animations with a few clicks, as well as customize their animations to meet their needs.
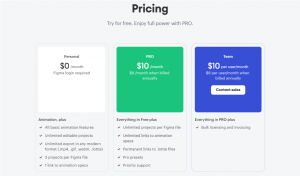
This plugin will help you to create animations in Figma without helping of after effects. Aninix UI animation plugin is free to use for everyone in the Figma community. Also, there have free and paid both plans. There have multiple export options like .mp4, .gif, .webm, .lottie, .png etc
Features
Flexible keyframes system
Create any micro-interactions or animations you want. You have total control over animation.
Animation specs
Share animation inspector with developers. So they can get all required info they need to recreate your animations.
Motion design system
Use curve styles to build your own motion design system. It works similar to Figma’s color styles but for animation.
Animation presets
Use animation presets to speed up your exploration process.
Export of Lottie files
You can export your animations directly to Lottie files (https://lottiefiles.com).
And export to other popular formats
Also we support exporting to mp4, webm and gif.
Where to find?
First. you need to install the plugin from the Figma community or Official Site.
Type “Aninix Ul animation” in Search Field and and install it.
Overview
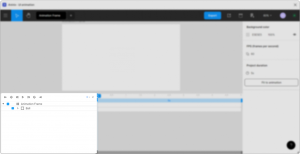
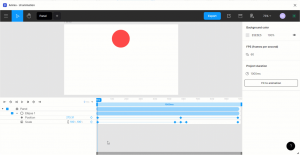
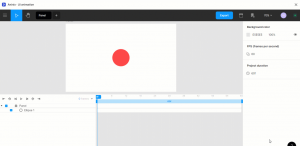
Before using Aninix Plugin, it is important to become familiar with the interface and how to use it. To do this, it is helpful to take some time to review the features and controls of the tool.
1. Frame Panel:
On the left side, you can view the frames and layers with their respective names. You can select a layer and add keyframes to animate it.
2. Timeline Panel:
On the left side, you can view the frames and layers with their respective names. You can select a layer and add keyframes to animate it.
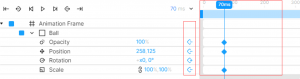
3. Keyframes
The Keyframe Editor allows you to create complex animations and effects by adding, deleting, and adjusting keyframes for layers. You can adjust timing, interpolation, and other properties for smooth and sophisticated animations.
4. Anchor Point
The anchor point is the point from which all transformations are manipulated. It is the point around which a layer will scale and rotate. Though it may seem redundant to have both an anchor point and a position transform property, these parameters serve different purposes.
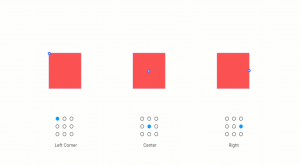
- Change Anchor Point Position
Just select the layer and in the right side, you can easily change the position of the Anchor Point.
The Anchor Point is the point of the layer that is used as the reference point when transforming or moving the layer. When you move or rotate the layer, it will move or rotate relative to the Anchor Point. By default, the Anchor Point is set to the Top Left of the layer, but you can change the Anchor Point to any point on the layer.
How to animate layer
1.Select the frame you want to animate after running the Aninix plugin.
2. Select the layer and set the anchor point.
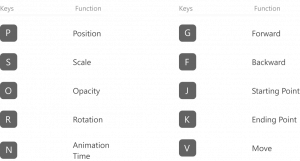
3. Press “P” for Position / “S” for Scale, and then you will be able to see the position keyframe (you can find the More shortcut keys below that will help a lot with animating your design).
4. Add and set keyframes to the layer’s Position, Opacity, Scale, Rotation properties to create the desired animation effects.
5. Press Space and play button to play the animation
Shortcut keys
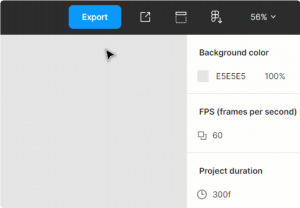
Export
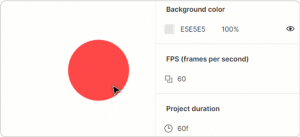
There have multiple export options like .mp4, .gif, .webm, .lottie, .png etc. Also, you can set the fps (Frame per second) and the time duration of your video.
Conclusion
In this blog, we learned about how to create After Effects-like animations in Figma Using Aninix Plugin. We discussed the different animation techniques, including the use of keyframes, layers, A, anchor points and frames. We also discussed how to export these animations into various formats.
Thanks for checking out our blog from Design Brewery. Our team of experienced designers can create stunning animation and motion design. If you’re looking for amazing Motion Figma UI Design, make sure to visit our website www.designbrewery.in to get in touch with us.